🚀 프로젝트 목표
사용자가 웹페이지에서 이메일을 작성하고 버튼을 클릭하면, Google Apps Script가 Gmail을 통해 이메일을 전송합니다. 버튼 클릭 시 “메일을 보내는 중…” 상태를 표시하여 사용자 경험을 향상시킵니다.
✅ 기능만 있는 기본 버전 ✅ 예쁜 디자인이 적용된 버전
📌 사전 준비
이 프로젝트를 사용하려면 Google Apps Script를 설정해야 합니다.
Google Apps Script 설정 방법
- Google Apps Script에 접속
- 새 프로젝트 생성
- 아래 코드를 붙여넣기
- “배포” → “새 배포” 클릭
- “유형 선택"에서 “웹 앱” 선택
- “앱 실행 권한"을 **“모든 사용자”**로 변경
- 배포 후 생성된 웹 앱 URL을 복사
- HTML 파일의 fetch() 부분에 복사한 URL을 적용
📌 Google Apps Script 코드 (Code.gs)
아래 코드를 Google Apps Script 프로젝트에 추가하세요.
function doGet() {
  return HtmlService.createHtmlOutput("Google Apps Script is working!");
}

function doPost(e) {
    try {
        MailApp.sendEmail({
            to: "mtinet79@gmail.com",
            subject: "새로운 문의가 도착했습니다!",
            body: "이름: " + e.parameter.name + "\n이메일: " + e.parameter.email + "\n메시지: " + e.parameter.message
        });

        return ContentService.createTextOutput(JSON.stringify({ status: "success" }))
            .setMimeType(ContentService.MimeType.JSON);
    } catch (error) {
        return ContentService.createTextOutput(JSON.stringify({ status: "error", message: error.toString() }))
            .setMimeType(ContentService.MimeType.JSON);
    }
}
📌 기능만 있는 기본 웹페이지 (simple.html)
<!DOCTYPE html>
<html lang="ko">
<head>
    <meta charset="UTF-8">
    <meta name="viewport" content="width=device-width, initial-scale=1.0">
    <title>간단한 연락처 폼</title>
</head>
<body>

    <h2>📩 연락하기</h2>
    <p>아래 정보를 입력한 후 "보내기" 버튼을 클릭하세요.</p>

    <form id="contact-form">
        <label>이름:</label>
        <input type="text" name="name" id="name" required><br><br>

        <label>이메일:</label>
        <input type="email" name="email" id="email" required><br><br>

        <label>메시지:</label>
        <textarea name="message" id="message" required></textarea><br><br>

        <button type="submit" id="submit-btn">📨 메시지 보내기</button>
        <p id="loading-message" style="display: none;">📨 메시지를 보내는 중...</p>
    </form>

    <script>
    document.addEventListener("DOMContentLoaded", function () {
        const form = document.getElementById("contact-form");
        const submitButton = document.getElementById("submit-btn");
        const loadingMessage = document.getElementById("loading-message");

        form.addEventListener("submit", function (event) {
            event.preventDefault(); // 기본 폼 제출 동작 방지

            submitButton.disabled = true; // 버튼 비활성화
            loadingMessage.style.display = "block"; // 로딩 메시지 표시

            const formData = new FormData(this);

            fetch("프로젝트를 만드는 사람의 구글 계정을 통해 만든 앱스크립트 배포 주소를 붙여넣으세요.", {
                method: "POST",
                body: formData
            })
            .then(response => response.text())
            .then(data => {
                alert("✅ 메시지가 성공적으로 전송되었습니다!");
                window.location.reload(); // 페이지 새로고침
            })
            .catch(error => {
                console.error("Error:", error);
                alert("❌ 메시지 전송에 실패했습니다. 다시 시도해주세요.");
            })
            .finally(() => {
                submitButton.disabled = false; // 버튼 다시 활성화
                loadingMessage.style.display = "none"; // 로딩 메시지 숨김
            });
        });
    });
    </script>

</body>
</html>
아래 부분은 자신의 앱 스크립트 배포 주소로 수정하세요.
 fetch("프로젝트를 만드는 사람의 구글 계정을 통해 만든 앱스크립트 배포 주소를 붙여넣으세요.", {
                method: "POST",
                body: formData
            })
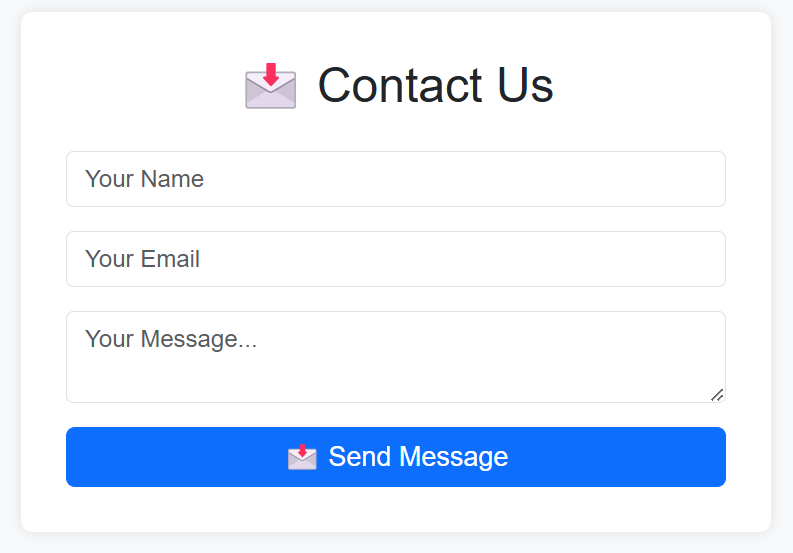
📌 예쁘게 꾸민 웹페이지 (index.html)
Bootstrap을 활용하여 깔끔한 UI 적용
<!DOCTYPE html>
<html lang="en">
<head>
    <meta charset="UTF-8">
    <meta name="viewport" content="width=device-width, initial-scale=1.0">
    <title>Contact Form</title>
    <link rel="stylesheet" href="https://cdn.jsdelivr.net/npm/bootstrap@5.3.0/dist/css/bootstrap.min.css">

    <style>
        body {
            font-family: 'Arial', sans-serif;
            background-color: #f8f9fa;
        }
        .container {
            max-width: 500px;
            margin-top: 50px;
            padding: 30px;
            background: white;
            border-radius: 8px;
            box-shadow: 0px 0px 10px rgba(0, 0, 0, 0.1);
        }
        .form-control {
            border-radius: 5px;
        }
        .btn-primary {
            width: 100%;
            font-size: 18px;
        }
        .btn-primary:disabled {
            background-color: gray;
            cursor: not-allowed;
        }
        #loading-message {
            display: none;
            font-weight: bold;
            color: #007bff;
            text-align: center;
            animation: fadeInOut 1s infinite alternate;
        }
        @keyframes fadeInOut {
            0% { opacity: 0.3; }
            100% { opacity: 1; }
        }
    </style>
</head>
<body>

<div class="container">
    <h2 class="text-center mb-4">📩 Contact Us</h2>

    <form id="contact-form">
        <div class="mb-3">
            <input type="text" name="name" id="name" class="form-control" placeholder="Your Name" required>
        </div>
        <div class="mb-3">
            <input type="email" name="email" id="email" class="form-control" placeholder="Your Email" required>
        </div>
        <div class="mb-3">
            <textarea name="message" id="message" class="form-control" placeholder="Your Message..." required></textarea>
        </div>
        <button type="submit" id="submit-btn" class="btn btn-primary">📩 Send Message</button>
        <p id="loading-message" class="mt-3">📨 Sending your message...</p>
    </form>
</div>

<script>
document.addEventListener("DOMContentLoaded", function () {
    const form = document.getElementById("contact-form");
    const submitButton = document.getElementById("submit-btn");
    const loadingMessage = document.getElementById("loading-message");

    form.addEventListener("submit", function (event) {
        event.preventDefault();

        // ✅ 버튼 비활성화 + 로딩 메시지 표시
        submitButton.disabled = true;
        loadingMessage.style.display = "block";

        const formData = new FormData(this);

        fetch("프로젝트를 만드는 사람의 구글 계정을 통해 만든 앱스크립트 배포 주소를 붙여넣으세요.", {
            method: "POST",
            body: formData
        })
        .then(response => response.text())
        .then(data => {
            alert("✅ Your message has been sent successfully!");
            window.location.reload();
        })
        .catch(error => {
            console.error("Error:", error);
            alert("❌ Failed to send message. Please try again.");
        })
        .finally(() => {
            // ✅ 버튼 다시 활성화 + 로딩 메시지 숨김
            submitButton.disabled = false;
            loadingMessage.style.display = "none";
        });
    });
});
</script>

</body>
</html>
아래 부분은 자신의 앱 스크립트 배포 주소로 수정하세요.
 fetch("프로젝트를 만드는 사람의 구글 계정을 통해 만든 앱스크립트 배포 주소를 붙여넣으세요.", {
                method: "POST",
                body: formData
            })
📌 마무리
✔ 기능만 필요한 경우 → simple.html
✔ 예쁜 디자인이 필요할 경우 → index.html
🚀 이제 Google Apps Script와 함께 배포해서 완벽한 이메일 전송 시스템을 만들자! 🚀